iOS Library
This guide will walk you through a simple application that will allow you to get up and running with the DHAP iOS library. To begin, create a new project in XCode.
File > New Project.
Select Single View App.
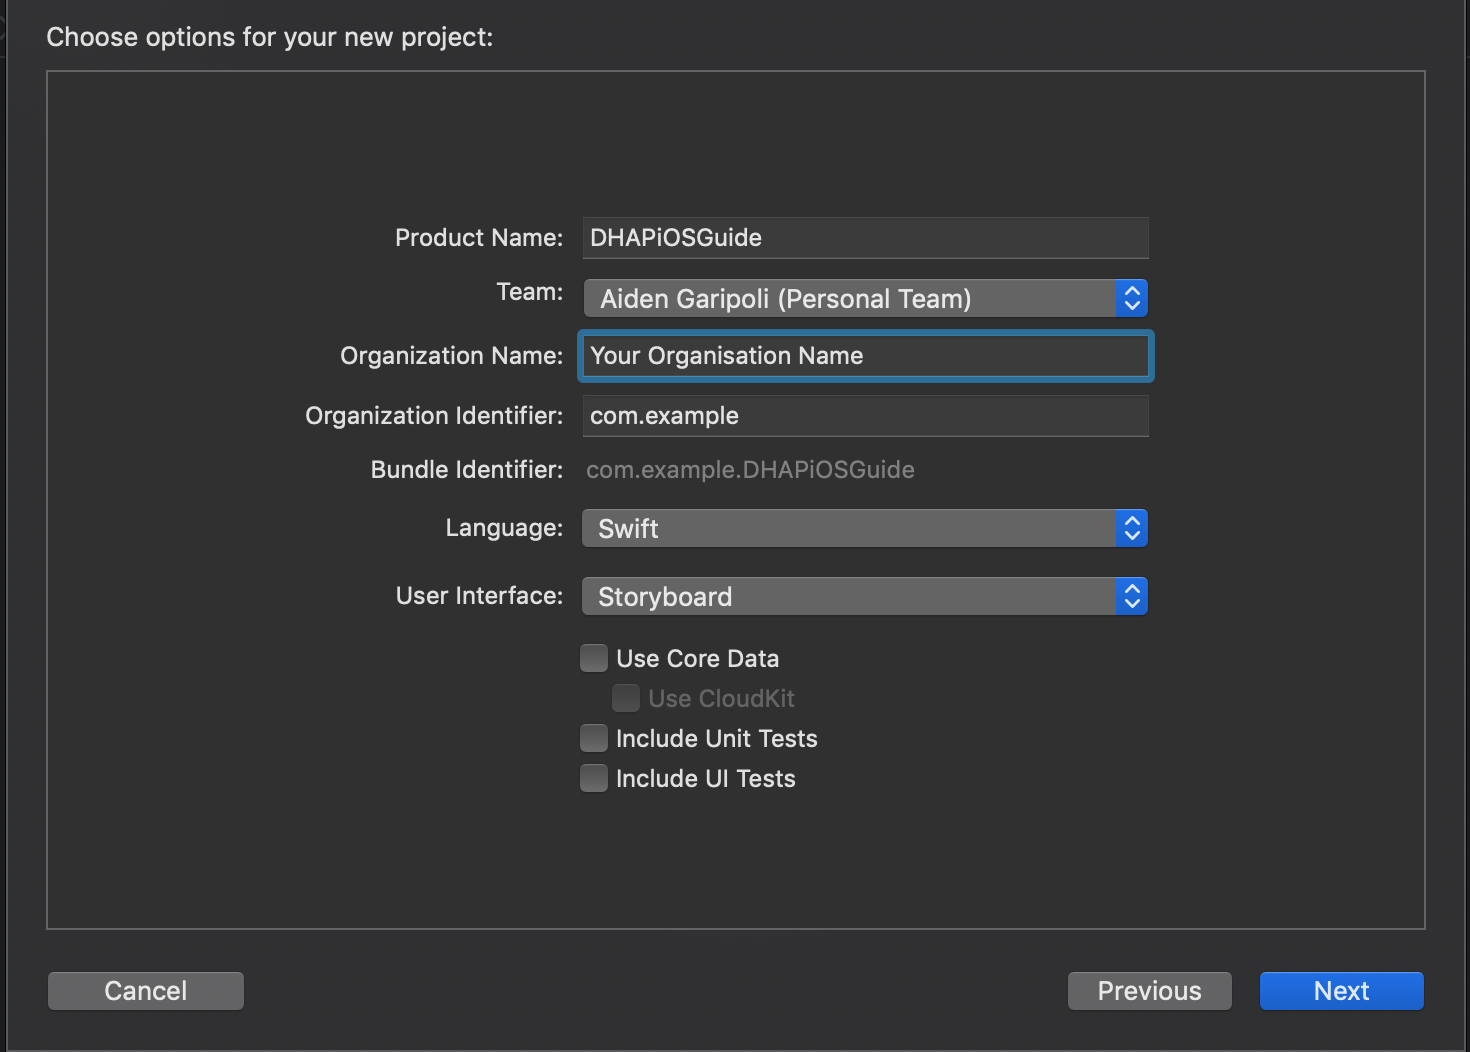
Ensure that you have selected Swift as the language and Storyboard for the user interface as shown below.
Give the project a name and enter your organisation name and identifier.

Now the project is setup, follow the link below to install the Library.
Library Installation
See iOS Installation for library installation instructions. Ensure that you are opening the workspace and not the project.
Usage
Now that the library is installed, you need to create an instance of the DHAP class which will give you access to all of the libraries functionality. For this guide, we'll use the ViewController XCode has created for us.
Navigate to ViewController.swift and add the following highlighted lines of code:
import UIKit
import DHAP

class ViewController: UIViewController {

    var dhap: DHAP?

    override func viewDidLoad() {
        super.viewDidLoad()
        // Do any additional setup after loading the view.
        dhap = DHAP()
    }

}
2
3
4
5
6
7
8
9
10
11
12
13
14
15
Now you can begin using the library to discovery devices which we will do next.
Discovery
Before you can begin controlling devices, you must discover them. To do this, you will use the DHAP instance and call the discoverDevices method.
Once again, navigate to ViewController.swift and add the following highlighted lines of code:
import UIKit
import DHAP

class ViewController: UIViewController {

    var dhap: DHAP?

    override func viewDidLoad() {
        super.viewDidLoad()
        // Do any additional setup after loading the view.
        dhap = DHAP()

        findDevices()
    }

    func findDevices() {
        dhap?.discoverDevices(completion: { (result) in
            switch result {
            case .foundDevices(let devices):
                print("Found \(devices.count) devices.")
            case .noDevicesFound:
                print("No devices found.")
            case .failure(let error):
                print(error.localizedDescription)
            }
        })
    }

}
2
3
4
5
6
7
8
9
10
11
12
13
14
15
16
17
18
19
20
21
22
23
24
25
26
27
28
29
30
The discoverDevices method will perform the DHAP discovery protocol and return to you the results of the operation in the callback. The result will be one of .foundDevices, .noDevicesFound or .failure.
Where .foundDevices means that the operation was successful and the library found one or more compliant devices on the network.
.noDevicesFound means that the operation was successful but the library did not find any compliant devices on the network.
.failure means that something went wrong during the discovery process and you can handle this in your application.